The Complete Guide to Growing Mushrooms: A Beginner-Friendly Overview
- Harold Evans

- Jan 29, 2025
- 4 min read
Updated: 1 day ago
Welcome to the World of Mushroom Cultivation
Mushroom growing is a fascinating blend of science and nature. Whether you're aiming to cultivate gourmet varieties for your kitchen or explore the art of mycology, understanding the basics will set you up for success. This guide breaks down the six key stages of mushroom cultivation, giving you a clear picture of the process and why it works.
The Mushroom Growing Cycle: Six Essential Stages

Mushrooms follow a natural life cycle, and cultivation mirrors this process. From inoculating grain to harvesting mature mushrooms, each stage plays a crucial role in ensuring a healthy and abundant crop. Let’s break it down.
Step 1: Inoculating Grain Spawn
What is it?
Inoculation introduces mushroom mycelium (the fungal root structure) into sterilized grain, providing a nutrient-rich medium for initial colonization.
How It Works:
Use sterilized jars or bags filled with oats, millet, or other grains.
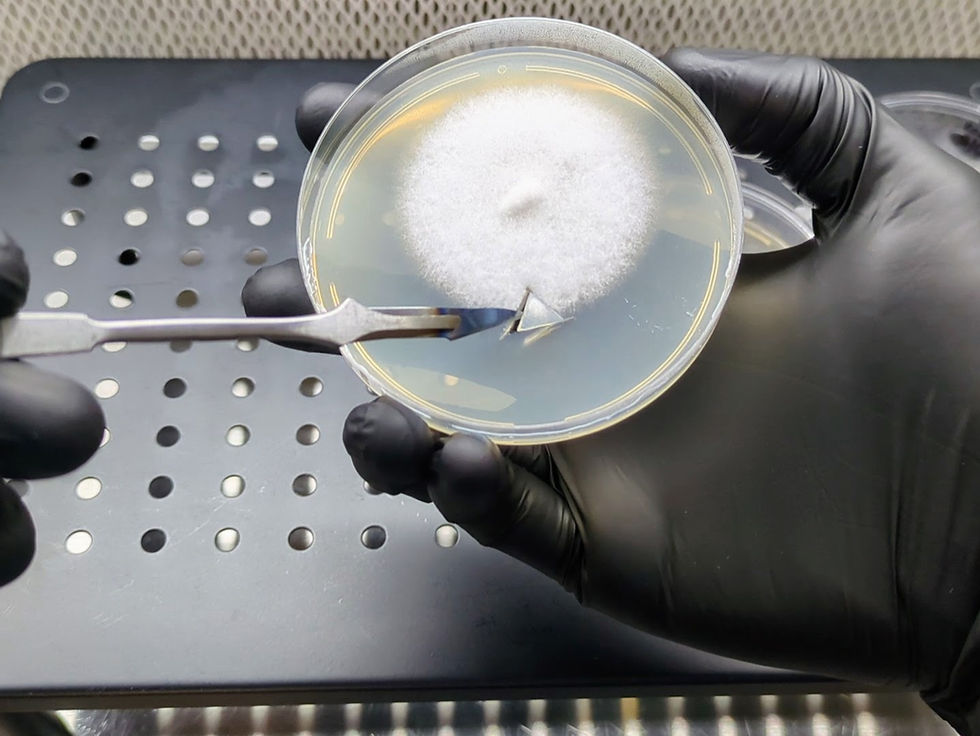
Introduce mycelium via a liquid culture syringe or a colonized agar wedge. Beginners often start with liquid culture for its simplicity - our LC jar lids make inoculation clean and straightforward with self-healing injection ports.
Maintain strict sterile conditions with a Still Air Box (SAB) or laminar flow hood to prevent contamination.
Why It Works:
Grains provide an ideal mix of carbohydrates, proteins, and moisture, creating a perfect environment for mycelium growth.
Step 2: Colonizing Grain Spawn
Once inoculated, the grain must be stored in stable conditions to allow full mycelial colonization.
Key Steps:
Store at the species’ optimal temperature (usually 68–72°F / 20–22°C).
Shake or mix the grain at 30% colonization to distribute mycelium evenly and speed up growth.
Shake again at 90–100% colonization as a final contamination check.
Goal:
Fully colonized grain will appear as a dense white network spreading throughout the jar or bag.
New to grain spawn preparation? Pre-sterilized grain bags eliminate the pressure canner step and arrive ready to inoculate, letting you focus on learning sterile technique.
Step 3. Inoculating Substrate
Grain spawn is then mixed with a bulk substrate, providing additional space and nutrients for the mycelium.
How It Works:
Common substrates include coco coir, vermiculite, or supplemented hardwood (depending on the mushroom species).
Mix spawn and substrate in a tub, bag, or container.
Maintain sterility when working with high-nutrient substrates to prevent contamination.
For reliable grain spawn containers, premium grain jar lids with proper gas exchange and injection ports make the process more forgiving for beginners.
Ratio Tip:
A 1:2 spawn-to-substrate ratio (e.g., 1 quart of spawn to 2 quarts of substrate) works well for coir-based substrates.
Step 4. Colonizing Substrate
During this phase, the mycelium fully colonizes the bulk substrate, preparing for fruiting.
Key Steps:
Cover containers with a lid to maintain high humidity.
Ensure gas exchange using micropore tape or filter bags.
Keep the substrate at the species’ ideal colonization temperature (usually 68–72°F / 20–22°C).
Signs of Progress:
A fully colonized substrate often appears white, though some species display different growth patterns.
Step 5. Initiating Fruiting Conditions
Mimicking natural environmental changes signals the mycelium to produce mushrooms.
Adjust These Factors:
Humidity: Maintain 85–95% RH using misting or humidifiers.
Fresh Air Exchange (FAE): Increase airflow by loosening lids or opening ventilation holes.
Light: Provide indirect light on a 12-hour cycle.
Temperature: Adjust to the species’ fruiting range (often cooler than colonization temperatures).
Goal:
Encourage the formation of pinheads (baby mushrooms), which will mature into full-grown mushrooms.
Step 6. Fruiting and Harvesting
The final stage is where mushrooms develop and are ready for harvest.
How It Works:
Maintain stable fruiting conditions.
Harvest at peak maturity—for example, oyster mushrooms should be picked just before the caps flatten.
Use a clean knife or gently twist mushrooms at the base to avoid damaging the substrate.
Pro Tip:
Harvesting correctly ensures multiple flushes (additional mushroom growth cycles) from the same substrate.
Why This Cycle Works
Each stage of cultivation replicates the natural fungal life cycle. By providing the right nutrients, conditions, and care at each step, you’re setting up a successful and sustainable mushroom-growing process.
Tools to Enhance Your Cultivation Journey
Still Air Box (SAB): Creates a sterile workspace, preventing airborne contaminants.
Monotub: A beginner-friendly fruiting chamber balancing humidity and airflow.
Liquid Culture: A rapid, efficient method to propagate mycelium, reducing colonization times.
Agar Plates: Essential for isolating clean cultures and troubleshooting contamination - sterile agar plates let you verify mycelium health before scaling up.
Growing Mushrooms: An Accessible Hobby
Mushroom cultivation is both an art and a science, accessible to anyone willing to learn. With patience and the right setup, you can transform simple grains and substrates into a bounty of fresh mushrooms.
Start small, experiment, and enjoy the process! Every batch is a learning experience that connects you to nature’s cycle of growth and renewal. Happy growing!
Ready to Start Growing?
Whether you're taking your first steps or building on experience, having reliable supplies removes guesswork and lets you focus on technique.
For beginners, we recommend:
Gourmet Grow Kits - Complete, beginner-friendly kits that fruit in 7-10 days
Sterilized Grain Bags (2lb) - Ready to inoculate, no pressure canner needed
Liquid Culture Jar Lids (2-Pack) - Simple inoculation with self-healing ports
For serious cultivators:
MEA Agar Plates (10-Pack) - Culture isolation and contamination testing
Premium Grain Jar Lids (6-Pack) - Reliable gas exchange for consistent colonization
Not sure where to start? Our grow kits are perfect for experiencing the full cultivation cycle before investing in supplies.


Comments